mNo edit summary |
(fixed formatting on previous editor's addition to insta-pup's letter) |
||
| (11 intermediate revisions by 9 users not shown) | |||
| Line 4: | Line 4: | ||
There are currently 43 Story letters, including 2 [[Events|Event]] letters, and 22 Permissions to Raise Prices letters. |
There are currently 43 Story letters, including 2 [[Events|Event]] letters, and 22 Permissions to Raise Prices letters. |
||
| + | ;Note |
||
| − | + | Information given below has been compiled by players. It may be inaccurate, work for a different letter, only work after many tries, and not work for all players. |
|
=Story Letters= |
=Story Letters= |
||
| − | {| style="width: 100%; border: 1px solid silver; background-color: #b0d3ce; text-align:center;" |
||
| ⚫ | |||
| ⚫ | |||
==Alice's Storybooks== |
==Alice's Storybooks== |
||
===Alice's Storybook 1=== |
===Alice's Storybook 1=== |
||
| Line 22: | Line 20: | ||
|- |
|- |
||
|{{Bluebell|1}} |
|{{Bluebell|1}} |
||
| − | |{{Sakura| |
+ | |{{Sakura|1~4}} |
|{{Gcan}} |
|{{Gcan}} |
||
|- |
|- |
||
| Line 37: | Line 35: | ||
|{{Bluebell|3}} |
|{{Bluebell|3}} |
||
|- |
|- |
||
| − | |{{Rrose|1}} |
+ | |{{Rrose|1~4}} |
| − | |{{Bluebell|1}} |
+ | |{{Bluebell|1~4}} |
|{{Gcan}} |
|{{Gcan}} |
||
|- |
|- |
||
|{{Gcan}} |
|{{Gcan}} |
||
|{{Bluebell|1}} |
|{{Bluebell|1}} |
||
| ⚫ | |||
| ⚫ | |||
| ⚫ | |||
| ⚫ | |||
|{{Gcan}} |
|{{Gcan}} |
||
|- |
|- |
||
| Line 75: | Line 69: | ||
|{{Sunflower|1}} |
|{{Sunflower|1}} |
||
|- |
|- |
||
| − | |{{Sunflower|4}} |
+ | |{{Sunflower|1~4}} |
| − | |{{ |
+ | |{{Rrose|1~4}} |
| − | |{{ |
+ | |{{Wrose|1~4}} |
|- |
|- |
||
|{{Daisy|3}} |
|{{Daisy|3}} |
||
| Line 83: | Line 77: | ||
|{{Rrose|3}} |
|{{Rrose|3}} |
||
|- |
|- |
||
| − | |{{Sunflower|4}} |
+ | |{{Sunflower|1~4}} |
| − | |{{ |
+ | |{{Wrose|1~4}} |
| − | |{{ |
+ | |{{Rrose|1~4}} |
| − | |- |
||
| ⚫ | |||
| ⚫ | |||
| ⚫ | |||
| − | |- |
||
| − | |{{Sunflower|4}} |
||
| ⚫ | |||
| ⚫ | |||
|- |
|- |
||
|colspan="3" style="border-bottom: 1px solid silver;"| |
|colspan="3" style="border-bottom: 1px solid silver;"| |
||
|- |
|- |
||
! Bonus |
! Bonus |
||
| − | | colspan="2" style="text-align:left;"| {{R|140}} |
+ | | colspan="2" style="text-align:left;"| {{R|+140}} |
|- |
|- |
||
! Unlocks |
! Unlocks |
||
| Line 129: | Line 115: | ||
|- |
|- |
||
! style="background-color: #cfe0d6;" |Bonus |
! style="background-color: #cfe0d6;" |Bonus |
||
| − | | colspan="2" style="text-align:left;"| |
+ | | colspan="2" style="text-align:left;"| — |
|- |
|- |
||
! style="background-color: #cfe0d6;" |Unlocks |
! style="background-color: #cfe0d6;" |Unlocks |
||
| Line 135: | Line 121: | ||
|- |
|- |
||
! style="background-color: #cfe0d6;" | Prerequisite |
! style="background-color: #cfe0d6;" | Prerequisite |
||
| − | | colspan="2" style="text-align:left;"| |
+ | | colspan="2" style="text-align:left;" | Pumpkin Chest |
|} |
|} |
||
| Line 161: | Line 147: | ||
|- |
|- |
||
! style="background-color: #cfe0d6;" | Prerequisite |
! style="background-color: #cfe0d6;" | Prerequisite |
||
| − | | colspan="2" style="text-align:left;"| |
+ | | colspan="2" style="text-align:left;" | Pumpkin Chest |
|} |
|} |
||
| Line 175: | Line 161: | ||
! scope="col" style="background-color: #b0d3ce; width: 33%;" |Slot 3 |
! scope="col" style="background-color: #b0d3ce; width: 33%;" |Slot 3 |
||
|- |
|- |
||
| − | |{{Sunflower|1}} |
+ | |{{Sunflower|1~4}} |
| − | |{{Rrose|1}} |
+ | |{{Rrose|1~4}} |
| − | |{{Bluebell|1}} |
+ | |{{Bluebell|1~4}} |
| − | |- |
||
| − | |{{Sunflower|1}} |
||
| − | |{{Rrose|4}} |
||
| − | |{{Bluebell|1}} |
||
|- |
|- |
||
|colspan="3" style="border-bottom: 1px solid silver;"| |
|colspan="3" style="border-bottom: 1px solid silver;"| |
||
| Line 208: | Line 190: | ||
|{{Bluebell|4}} |
|{{Bluebell|4}} |
||
|{{Wrose|1}} |
|{{Wrose|1}} |
||
| − | |- |
||
| − | |{{Sunflower|4}} |
||
| − | |{{Wrose|1}} |
||
| − | |{{Rrose|1}} |
||
|- |
|- |
||
|{{Sunflower|4}} |
|{{Sunflower|4}} |
||
| Line 307: | Line 285: | ||
|- |
|- |
||
! style="background-color: #cfe0d6;" |Bonus |
! style="background-color: #cfe0d6;" |Bonus |
||
| − | | colspan="2" style="text-align:left;"| |
+ | | colspan="2" style="text-align:left;"| {{R|+20}} |
|- |
|- |
||
! style="background-color: #cfe0d6;" |Unlocks |
! style="background-color: #cfe0d6;" |Unlocks |
||
| Line 333: | Line 311: | ||
|- |
|- |
||
! style="background-color: #cfe0d6;" |Bonus |
! style="background-color: #cfe0d6;" |Bonus |
||
| − | | colspan="2" style="text-align:left;"| |
+ | | colspan="2" style="text-align:left;"| {{R|+35}} |
|- |
|- |
||
! style="background-color: #cfe0d6;" |Unlocks |
! style="background-color: #cfe0d6;" |Unlocks |
||
| Line 359: | Line 337: | ||
|- |
|- |
||
! style="background-color: #cfe0d6;" |Bonus |
! style="background-color: #cfe0d6;" |Bonus |
||
| − | | colspan="2" style="text-align:left;"| |
+ | | colspan="2" style="text-align:left;"| {{R|+50}} |
|- |
|- |
||
! style="background-color: #cfe0d6;" |Unlocks |
! style="background-color: #cfe0d6;" |Unlocks |
||
| Line 403: | Line 381: | ||
! scope="col" style="background-color: #cfe0d6; width: 33%;" |Slot 2 |
! scope="col" style="background-color: #cfe0d6; width: 33%;" |Slot 2 |
||
! scope="col" style="background-color: #cfe0d6; width: 33%;" |Slot 3 |
! scope="col" style="background-color: #cfe0d6; width: 33%;" |Slot 3 |
||
| ⚫ | |||
| ⚫ | |||
| + | |{{Snowflake|1~4}} |
||
| ⚫ | |||
|- |
|- |
||
|colspan="3" style="border-bottom: 1px solid silver;"| |
|colspan="3" style="border-bottom: 1px solid silver;"| |
||
|- |
|- |
||
! style="background-color: #cfe0d6;" |Bonus |
! style="background-color: #cfe0d6;" |Bonus |
||
| − | | colspan="2" style="text-align:left;"| |
+ | | colspan="2" style="text-align:left;"| {{R|+260}} |
|- |
|- |
||
! style="background-color: #cfe0d6;" |Unlocks |
! style="background-color: #cfe0d6;" |Unlocks |
||
| Line 460: | Line 442: | ||
|{{Mleaf|1~4}} |
|{{Mleaf|1~4}} |
||
|- |
|- |
||
| ⚫ | |||
| − | |colspan="3" style="border-bottom: 1px solid silver;"| |
||
| ⚫ | |||
| ⚫ | |||
|- |
|- |
||
! style="background-color: #cfe0d6;" |Bonus |
! style="background-color: #cfe0d6;" |Bonus |
||
| Line 497: | Line 481: | ||
|- |
|- |
||
! style="background-color: #cfe0d6;" |Bonus |
! style="background-color: #cfe0d6;" |Bonus |
||
| − | | colspan="2" style="text-align:left;"| |
+ | | colspan="2" style="text-align:left;"| {{R|+75}} |
|- |
|- |
||
! style="background-color: #cfe0d6;" |Unlocks |
! style="background-color: #cfe0d6;" |Unlocks |
||
| Line 558: | Line 542: | ||
|- |
|- |
||
! style="background-color: #cfe0d6;" |Bonus |
! style="background-color: #cfe0d6;" |Bonus |
||
| − | | colspan="2" style="text-align:left;"| |
+ | | colspan="2" style="text-align:left;"| {{R|+250}} |
|- |
|- |
||
! style="background-color: #cfe0d6;" |Unlocks |
! style="background-color: #cfe0d6;" |Unlocks |
||
| Line 584: | Line 568: | ||
|- |
|- |
||
! style="background-color: #cfe0d6;" |Bonus |
! style="background-color: #cfe0d6;" |Bonus |
||
| − | | colspan="2" style="text-align:left;"| |
+ | | colspan="2" style="text-align:left;"| {{R|+270}} |
|- |
|- |
||
! style="background-color: #cfe0d6;" |Unlocks |
! style="background-color: #cfe0d6;" |Unlocks |
||
| Line 671: | Line 655: | ||
|- |
|- |
||
! style="background-color: #cfe0d6;" |Bonus |
! style="background-color: #cfe0d6;" |Bonus |
||
| − | | colspan="2" style="text-align:left;"| |
+ | | colspan="2" style="text-align:left;"| {{R|+600}} |
|- |
|- |
||
! style="background-color: #cfe0d6;" |Unlocks |
! style="background-color: #cfe0d6;" |Unlocks |
||
| Line 737: | Line 721: | ||
|- |
|- |
||
! style="background-color: #cfe0d6;" |Bonus |
! style="background-color: #cfe0d6;" |Bonus |
||
| − | | colspan="2" style="text-align:left;" | |
+ | | colspan="2" style="text-align:left;" | {{R|+240}} |
|- |
|- |
||
! style="background-color: #cfe0d6;" |Unlocks |
! style="background-color: #cfe0d6;" |Unlocks |
||
| Line 763: | Line 747: | ||
|{{Bluebell|3}} |
|{{Bluebell|3}} |
||
|{{Rrose|3}} |
|{{Rrose|3}} |
||
| ⚫ | |||
| + | |colspan="3"|Part of the storyline, obtain with empty slots |
||
|- |
|- |
||
| colspan="3" style="border-bottom: 1px solid silver;" | |
| colspan="3" style="border-bottom: 1px solid silver;" | |
||
| Line 793: | Line 779: | ||
|- |
|- |
||
! style="background-color: #cfe0d6;" |Bonus |
! style="background-color: #cfe0d6;" |Bonus |
||
| − | | colspan="2" style="text-align:left;" | |
+ | | colspan="2" style="text-align:left;" | {{R|+100}} |
|- |
|- |
||
! style="background-color: #cfe0d6;" |Unlocks |
! style="background-color: #cfe0d6;" |Unlocks |
||
| Line 976: | Line 962: | ||
|- |
|- |
||
! style="background-color: #cfe0d6;" |Bonus |
! style="background-color: #cfe0d6;" |Bonus |
||
| − | | colspan="2" style="text-align:left;" | {{R|+ |
+ | | colspan="2" style="text-align:left;" | {{R|+165}} |
|- |
|- |
||
! style="background-color: #cfe0d6;" |Unlocks |
! style="background-color: #cfe0d6;" |Unlocks |
||
| − | | colspan="2" style="text-align:left;" | |
+ | | colspan="2" style="text-align:left;" | — |
|- |
|- |
||
! style="background-color: #cfe0d6;" | Prerequisite |
! style="background-color: #cfe0d6;" | Prerequisite |
||
| Line 1,023: | Line 1,009: | ||
| colspan="3" |You will receive this gift from the [[Ad Salesman]] when watching an ad during the [[Lunar New Year]] event. |
| colspan="3" |You will receive this gift from the [[Ad Salesman]] when watching an ad during the [[Lunar New Year]] event. |
||
|} |
|} |
||
| − | <br /> |
||
<br /> |
<br /> |
||
<br /> |
<br /> |
||
| Line 1,115: | Line 1,100: | ||
|- |
|- |
||
! style="background-color: #cfe0d6;" |Bonus |
! style="background-color: #cfe0d6;" |Bonus |
||
| − | | colspan="2" style="text-align:left;" | |
+ | | colspan="2" style="text-align:left;" | {{R|+200}} |
|- |
|- |
||
! style="background-color: #cfe0d6;" |Unlocks |
! style="background-color: #cfe0d6;" |Unlocks |
||
| − | | colspan="2" style="text-align:left;" | |
+ | | colspan="2" style="text-align:left;" |Floating Teacup |
|- |
|- |
||
! style="background-color: #cfe0d6;" | Prerequisite |
! style="background-color: #cfe0d6;" | Prerequisite |
||
| Line 1,217: | Line 1,202: | ||
|{{Daisy|2}} |
|{{Daisy|2}} |
||
|{{Bluebell|1}} |
|{{Bluebell|1}} |
||
| ⚫ | |||
| ⚫ | |||
| ⚫ | |||
| ⚫ | |||
|- |
|- |
||
| colspan="3" style="border-bottom: 1px solid silver;" | |
| colspan="3" style="border-bottom: 1px solid silver;" | |
||
| Line 1,292: | Line 1,281: | ||
<br /> |
<br /> |
||
<br /> |
<br /> |
||
| + | |||
=Permissions to Raise Prices= |
=Permissions to Raise Prices= |
||
| + | |||
| − | {| style="width: 100%; border: 1px solid silver; background-color: #b0d3ce; text-align:center;" |
||
| ⚫ | |||
| − | | |
||
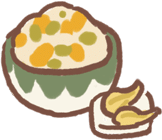
| + | [[File:Adzuki_Bean_Bun.png|right|90px|thumb|[[Adzuki Bean Dumpling]]]] |
||
| − | |} |
||
| ⚫ | |||
| ⚫ | |||
{| style="width: 50%; border: 1px solid silver; background-color: #f9f7f1; text-align:center;" |
{| style="width: 50%; border: 1px solid silver; background-color: #f9f7f1; text-align:center;" |
||
|- |
|- |
||
| Line 1,325: | Line 1,313: | ||
| colspan="2" style="text-align:left;" | — |
| colspan="2" style="text-align:left;" | — |
||
|} |
|} |
||
| + | |||
| − | + | ==Americano== |
|
| + | [[File:Americano.png|right|70px|thumb|[[Americano]]]] |
||
{| style="width: 50%; border: 1px solid silver; background-color: #f9f7f1; text-align:center;" |
{| style="width: 50%; border: 1px solid silver; background-color: #f9f7f1; text-align:center;" |
||
|- |
|- |
||
| Line 1,353: | Line 1,343: | ||
| colspan="2" style="text-align:left;" | — |
| colspan="2" style="text-align:left;" | — |
||
|} |
|} |
||
| + | |||
| − | + | ==Buttered Toast== |
|
| + | [[File:Buttered_Toast.png|right|90px|thumb|[[Buttered Toast]]]] |
||
{| style="width: 50%; border: 1px solid silver; background-color: #f9f7f1; text-align:center;" |
{| style="width: 50%; border: 1px solid silver; background-color: #f9f7f1; text-align:center;" |
||
|- |
|- |
||
| Line 1,382: | Line 1,374: | ||
|} |
|} |
||
| + | ==Coconut Cassia Wine== |
||
| − | {{Item}} |
||
| − | + | [[File:Coconut_Cassia_Wine.png|right|90px|thumb|[[Coconut Cassia Wine]]]] |
|
{| style="width: 50%; border: 1px solid silver; background-color: #f9f7f1; text-align:center;" |
{| style="width: 50%; border: 1px solid silver; background-color: #f9f7f1; text-align:center;" |
||
|- |
|- |
||
| Line 1,407: | Line 1,399: | ||
| colspan="2" style="text-align:left;" | — |
| colspan="2" style="text-align:left;" | — |
||
|} |
|} |
||
| + | |||
| − | + | ==Cupcake== |
|
| + | [[File:Cupcake.png|right|90px|thumb|[[Cupcake]]]] |
||
{| style="width: 50%; border: 1px solid silver; background-color: #f9f7f1; text-align:center;" |
{| style="width: 50%; border: 1px solid silver; background-color: #f9f7f1; text-align:center;" |
||
|- |
|- |
||
| Line 1,431: | Line 1,425: | ||
| colspan="2" style="text-align:left;" | — |
| colspan="2" style="text-align:left;" | — |
||
|} |
|} |
||
| + | |||
| − | + | ==Cup Noodles== |
|
| + | [[File:Cup_Noodles.png|right|70px|thumb|[[Cup Noodles]]]] |
||
{| style="width: 50%; border: 1px solid silver; background-color: #f9f7f1; text-align:center;" |
{| style="width: 50%; border: 1px solid silver; background-color: #f9f7f1; text-align:center;" |
||
|- |
|- |
||
| Line 1,459: | Line 1,455: | ||
| colspan="2" style="text-align:left;" | — |
| colspan="2" style="text-align:left;" | — |
||
|} |
|} |
||
| + | |||
| − | + | ==Curry Rice== |
|
| + | [[File:Curry_Rice.png|right|90px|thumb|[[Curry Rice]]]] |
||
{| style="width: 50%; border: 1px solid silver; background-color: #f9f7f1; text-align:center;" |
{| style="width: 50%; border: 1px solid silver; background-color: #f9f7f1; text-align:center;" |
||
|- |
|- |
||
| Line 1,483: | Line 1,481: | ||
| colspan="2" style="text-align:left;" | — |
| colspan="2" style="text-align:left;" | — |
||
|} |
|} |
||
| + | |||
| − | + | ==Fried Rice== |
|
| + | [[File:Fried_Rice.png|right|90px|thumb|[[Fried Rice]]]] |
||
{| style="width: 50%; border: 1px solid silver; background-color: #f9f7f1; text-align:center;" |
{| style="width: 50%; border: 1px solid silver; background-color: #f9f7f1; text-align:center;" |
||
|- |
|- |
||
| Line 1,507: | Line 1,507: | ||
| colspan="2" style="text-align:left;" | — |
| colspan="2" style="text-align:left;" | — |
||
|} |
|} |
||
| + | |||
| − | + | ==Fried Shrimp Sushi== |
|
| + | [[File:Fried_Shrimp_Sushi.png|right|90px|thumb|[[Fried Shrimp Sushi]]]] |
||
{| style="width: 50%; border: 1px solid silver; background-color: #f9f7f1; text-align:center;" |
{| style="width: 50%; border: 1px solid silver; background-color: #f9f7f1; text-align:center;" |
||
|- |
|- |
||
| Line 1,535: | Line 1,537: | ||
| colspan="2" style="text-align:left;" | — |
| colspan="2" style="text-align:left;" | — |
||
|} |
|} |
||
| + | |||
| − | + | ==Mango Surprise== |
|
| + | [[File:Mango_Surprise.png|right|90px|thumb|[[Mango Surprise]]]] |
||
{| style="width: 50%; border: 1px solid silver; background-color: #f9f7f1; text-align:center;" |
{| style="width: 50%; border: 1px solid silver; background-color: #f9f7f1; text-align:center;" |
||
|- |
|- |
||
| Line 1,559: | Line 1,563: | ||
| colspan="2" style="text-align:left;" | — |
| colspan="2" style="text-align:left;" | — |
||
|} |
|} |
||
| + | |||
| − | + | ==Mushroom Pasta== |
|
| + | [[File:Mushroom_Pasta.png|right|90px|thumb|[[Mushroom Pasta]]]] |
||
{| style="width: 50%; border: 1px solid silver; background-color: #f9f7f1; text-align:center;" |
{| style="width: 50%; border: 1px solid silver; background-color: #f9f7f1; text-align:center;" |
||
|- |
|- |
||
| Line 1,587: | Line 1,593: | ||
| colspan="2" style="text-align:left;" | — |
| colspan="2" style="text-align:left;" | — |
||
|} |
|} |
||
| + | |||
| − | + | ==Orange Juice== |
|
| + | [[File:Orange_Juice.png|right|80px|thumb|[[Orange Juice]]]] |
||
{| style="width: 50%; border: 1px solid silver; background-color: #f9f7f1; text-align:center;" |
{| style="width: 50%; border: 1px solid silver; background-color: #f9f7f1; text-align:center;" |
||
|- |
|- |
||
| Line 1,611: | Line 1,619: | ||
| colspan="2" style="text-align:left;" | — |
| colspan="2" style="text-align:left;" | — |
||
|} |
|} |
||
| + | |||
| − | + | ==Porridge & Jam== |
|
| + | [[File:Porridge_&_Jam.png|right|90px|thumb|[[Porridge & Jam]]]] |
||
{| style="width: 50%; border: 1px solid silver; background-color: #f9f7f1; text-align:center;" |
{| style="width: 50%; border: 1px solid silver; background-color: #f9f7f1; text-align:center;" |
||
|- |
|- |
||
| Line 1,635: | Line 1,645: | ||
| colspan="2" style="text-align:left;" | — |
| colspan="2" style="text-align:left;" | — |
||
|} |
|} |
||
| + | |||
| − | + | ==Purple Sweet Potato Bun== |
|
| + | [[File:Purple_Sweet_Potato_Bun.png|right|90px|thumb|[[Purple Sweet Potato Bun]]]] |
||
{| style="width: 50%; border: 1px solid silver; background-color: #f9f7f1; text-align:center;" |
{| style="width: 50%; border: 1px solid silver; background-color: #f9f7f1; text-align:center;" |
||
|- |
|- |
||
| Line 1,659: | Line 1,671: | ||
| colspan="2" style="text-align:left;" | — |
| colspan="2" style="text-align:left;" | — |
||
|} |
|} |
||
| + | |||
| − | + | ==Ramen== |
|
| ⚫ | |||
{| style="width: 50%; border: 1px solid silver; background-color: #f9f7f1; text-align:center;" |
{| style="width: 50%; border: 1px solid silver; background-color: #f9f7f1; text-align:center;" |
||
|- |
|- |
||
| Line 1,687: | Line 1,701: | ||
| colspan="2" style="text-align:left;" | — |
| colspan="2" style="text-align:left;" | — |
||
|} |
|} |
||
| + | |||
| − | + | ==Rice Pudding== |
|
| + | [[File:Rice_Pudding.png|right|90px|thumb|[[Rice Pudding]]]] |
||
{| style="width: 50%; border: 1px solid silver; background-color: #f9f7f1; text-align:center;" |
{| style="width: 50%; border: 1px solid silver; background-color: #f9f7f1; text-align:center;" |
||
|- |
|- |
||
| Line 1,711: | Line 1,727: | ||
| colspan="2" style="text-align:left;" | — |
| colspan="2" style="text-align:left;" | — |
||
|} |
|} |
||
| + | |||
| − | + | ==Seaweed Rice Ball== |
|
| + | [[File:Seaweed_Rice_Ball.png|right|90px|thumb|[[Seaweed Rice Ball]]]] |
||
{| style="width: 50%; border: 1px solid silver; background-color: #f9f7f1; text-align:center;" |
{| style="width: 50%; border: 1px solid silver; background-color: #f9f7f1; text-align:center;" |
||
|- |
|- |
||
| Line 1,735: | Line 1,753: | ||
| colspan="2" style="text-align:left;" | — |
| colspan="2" style="text-align:left;" | — |
||
|} |
|} |
||
| + | |||
| − | + | ==Spaghetti== |
|
| + | [[File:Spaghetti.png|right|90px|thumb|[[Spaghetti]]]] |
||
{| style="width: 50%; border: 1px solid silver; background-color: #f9f7f1; text-align:center;" |
{| style="width: 50%; border: 1px solid silver; background-color: #f9f7f1; text-align:center;" |
||
|- |
|- |
||
| Line 1,759: | Line 1,779: | ||
| colspan="2" style="text-align:left;" | — |
| colspan="2" style="text-align:left;" | — |
||
|} |
|} |
||
| + | |||
| − | + | ==Steamed Clams== |
|
| + | [[File:Steamed_Clams.png|right|90px|thumb|[[Steamed Clams]]]] |
||
{| style="width: 50%; border: 1px solid silver; background-color: #f9f7f1; text-align:center;" |
{| style="width: 50%; border: 1px solid silver; background-color: #f9f7f1; text-align:center;" |
||
|- |
|- |
||
| Line 1,783: | Line 1,805: | ||
| colspan="2" style="text-align:left;" | — |
| colspan="2" style="text-align:left;" | — |
||
|} |
|} |
||
| + | |||
| − | + | ==Strawberry Shaved Ice== |
|
| + | [[File:Strawberry_Shaved_Ice.png|right|80px|thumb|[[Strawberry Shaved Ice]]]] |
||
{| style="width: 50%; border: 1px solid silver; background-color: #f9f7f1; text-align:center;" |
{| style="width: 50%; border: 1px solid silver; background-color: #f9f7f1; text-align:center;" |
||
|- |
|- |
||
| Line 1,807: | Line 1,831: | ||
| colspan="2" style="text-align:left;" | — |
| colspan="2" style="text-align:left;" | — |
||
|} |
|} |
||
| + | |||
| − | + | ==Strawberry Pancake== |
|
| + | [[File:Strawberry_Pancake.png|right|90px|thumb|[[Strawberry Pancake]]]] |
||
{| style="width: 50%; border: 1px solid silver; background-color: #f9f7f1; text-align:center;" |
{| style="width: 50%; border: 1px solid silver; background-color: #f9f7f1; text-align:center;" |
||
|- |
|- |
||
| Line 1,831: | Line 1,857: | ||
| colspan="2" style="text-align:left;" | — |
| colspan="2" style="text-align:left;" | — |
||
|} |
|} |
||
| + | |||
| − | + | ==Taiyaki== |
|
| + | [[File:Taiyaki.png|right|90px|thumb|[[Taiyaki]]]] |
||
{| style="width: 50%; border: 1px solid silver; background-color: #f9f7f1; text-align:center;" |
{| style="width: 50%; border: 1px solid silver; background-color: #f9f7f1; text-align:center;" |
||
|- |
|- |
||
Revision as of 22:22, 1 April 2020
| SOMETHING'S MISSING! This article is a stub. Can you help out? Click here to add more. |
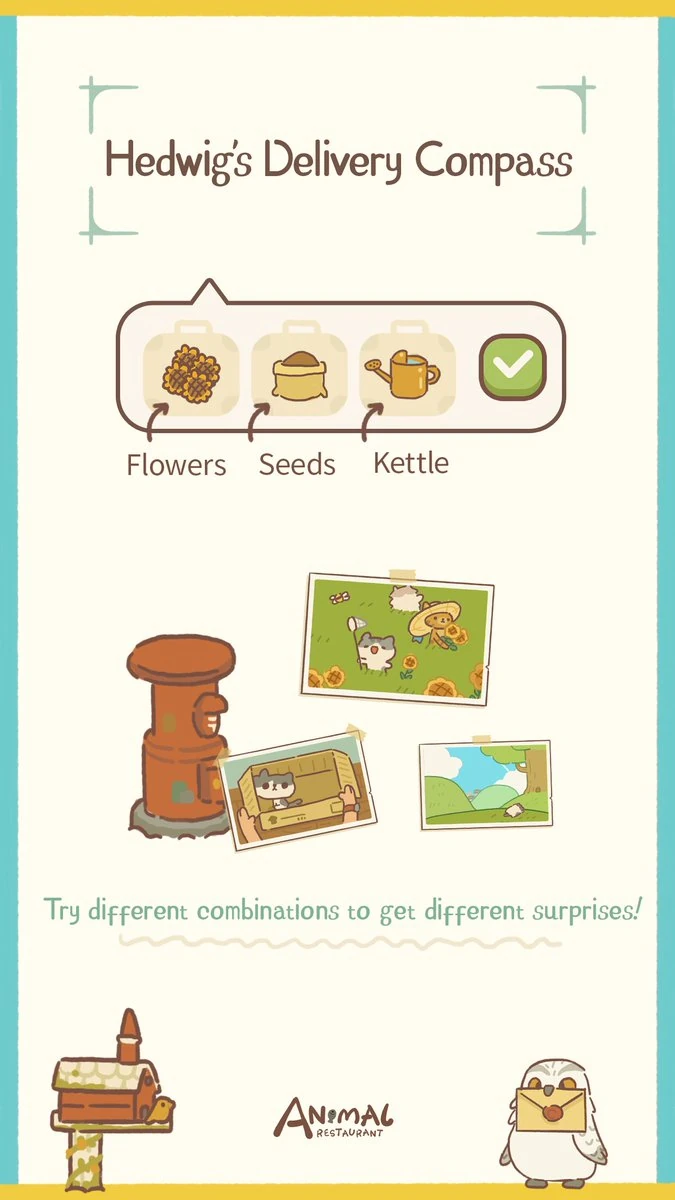
For each letter, there are multiple available combinations. The order the player puts the items in each slot matters.
There are currently 43 Story letters, including 2 Event letters, and 22 Permissions to Raise Prices letters.
- Note
Information given below has been compiled by players. It may be inaccurate, work for a different letter, only work after many tries, and not work for all players.
Story Letters
Alice's Storybooks
Alice's Storybook 1
To read this letter, see: Alice's Storybook 1
| Combination(s) | ||
|---|---|---|
| Slot 1 | Slot 2 | Slot 3 |
Gold Can | ||
Gold Can |
Seed | |
Gold Can |
Seed | |
Gold Can |
||
Gold Can | ||
Gold Can |
Gold Can | |
| Bonus | ||
| Unlocks | Blue Folding Curtain, Dreams of Tattered Leaves | |
| Prerequisite | — | |
Alice's Storybook 2


To read this letter, see: Alice's Storybook 2
| Combination(s) | ||
|---|---|---|
| Slot 1 | Slot 2 | Slot 3 |
| Bonus | ||
| Unlocks | Candy Hearts Cabinet | |
| Prerequisite | ? | |
Beaver's Letters
Beaver's Letter 1


To read this letter, see: Beaver's Letter 1
| Combination(s) | ||
|---|---|---|
| Slot 1 | Slot 2 | Slot 3 |
Iron Can | ||
Iron Can |
||
| Bonus | — | |
| Unlocks | Wisp | |
| Prerequisite | Pumpkin Chest | |
Beaver's Letter 2


To read this letter, see: Beaver's Letter 2
| Combination(s) | ||
|---|---|---|
| Slot 1 | Slot 2 | Slot 3 |
Iron Can | ||
| Bonus | ||
| Unlocks | Spiderweb | |
| Prerequisite | Pumpkin Chest | |
Border Collie's Letters
Border Collie's Letter

To read this letter, see: Border Collie's Letter
| Combination(s) | ||
|---|---|---|
| Slot 1 | Slot 2 | Slot 3 |
| Bonus | ||
| Unlocks | Elegant Blues | |
| Prerequisite | — | |
Border Collie's Postcard
To read this letter, see: Border Collie's Postcard
| Combination(s) | ||
|---|---|---|
| Slot 1 | Slot 2 | Slot 3 |
Gold Can | ||
| Bonus | ||
| Unlocks | Coconut Cassia Wine | |
| Prerequisite | — | |
Eggy's Diary
Eggy's Diary 1
To read this letter, see: Eggy's Diary 1
| Combination(s) | ||
|---|---|---|
| Slot 1 | Slot 2 | Slot 3 |
Seed |
Iron Can | |
| Bonus | ||
| Unlocks | ? | |
| Prerequisite | ? | |
Eggy's Diary 2


To read this letter, see: Eggy's Diary 2
| Combination(s) | ||
|---|---|---|
| Slot 1 | Slot 2 | Slot 3 |
| Bonus | ||
| Unlocks | ? | |
| Prerequisite | ? | |
Eggy's Diary 3
To read this letter, see: Eggy's Diary 3
| Combination(s) | ||
|---|---|---|
| Slot 1 | Slot 2 | Slot 3 |
| Sold by the Mysterious Merchant. | ||
| Obtained randomly during the Halloween event. | ||
| Obtained via Gachapon. | ||
| Bonus | ||
| Unlocks | ? | |
| Prerequisite | ? | |
Eggy's Diary 4
To read this letter, see: Eggy's Diary 4
| Combination(s) | ||
|---|---|---|
| Slot 1 | Slot 2 | Slot 3 |
| Sold by the Mysterious Merchant. | ||
| Obtained randomly during the Halloween event. | ||
| Obtained via Gachapon. | ||
| Bonus | ||
| Unlocks | ? | |
| Prerequisite | ? | |
Eggy's Diary 5
To read this letter, see: Eggy's Diary 5
| Combination(s) | ||
|---|---|---|
| Slot 1 | Slot 2 | Slot 3 |
| Sold by the Mysterious Merchant. | ||
| Obtained randomly during the Halloween event. | ||
| Obtained via Gachapon. | ||
| Bonus | ||
| Unlocks | ? | |
| Prerequisite | ? | |
Eggy's Diary 6
To read this letter, see: Eggy's Diary 6
| Combination(s) | ||
|---|---|---|
| Slot 1 | Slot 2 | Slot 3 |
Copper Can |
||
| Bonus | ||
| Unlocks | Reverie Bar | |
| Prerequisite | ? | |
Eggy's Diary 7


To read this letter, see: Eggy's Diary 7
| Combination(s) | ||
|---|---|---|
| Slot 1 | Slot 2 | Slot 3 |
| Bonus | ||
| Unlocks | ? | |
| Prerequisite | ? | |
Eggy's Diary 8
To read this letter, see: Eggy's Diary 8
| Combination(s) | ||
|---|---|---|
| Slot 1 | Slot 2 | Slot 3 |
| Obtained randomly during the Lunar New Year event. | ||
| Bonus | — | |
| Unlocks | — | |
| Prerequisite | — | |
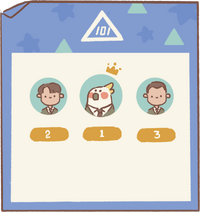
Insta-Pup's Letter


To read this letter, see: Insta-Pup's Letter
| Combination(s) | ||
|---|---|---|
| Slot 1 | Slot 2 | Slot 3 |
Copper Can | ||
Copper Can |
||
| Bonus | ||
| Unlocks | Mushroom Forest, Spicy Crawdads | |
| Prerequisite | Insta-Pup | |
Landlubber Goose


To read this letter, see: Landlubber Goose
| Combination(s) | ||
|---|---|---|
| Slot 1 | Slot 2 | Slot 3 |
Gold Can |
Copper Can | |
Copper Can |
Gold Can |
Copper Can |
| Bonus | ||
| Unlocks | ? | |
| Prerequisite | ? | |
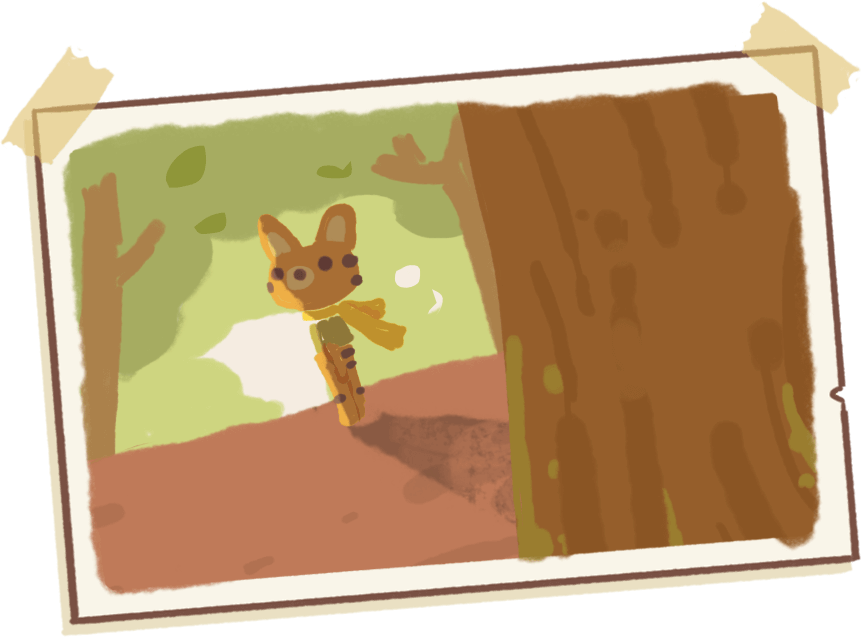
Little Fox's Letters
Little Fox's Letter
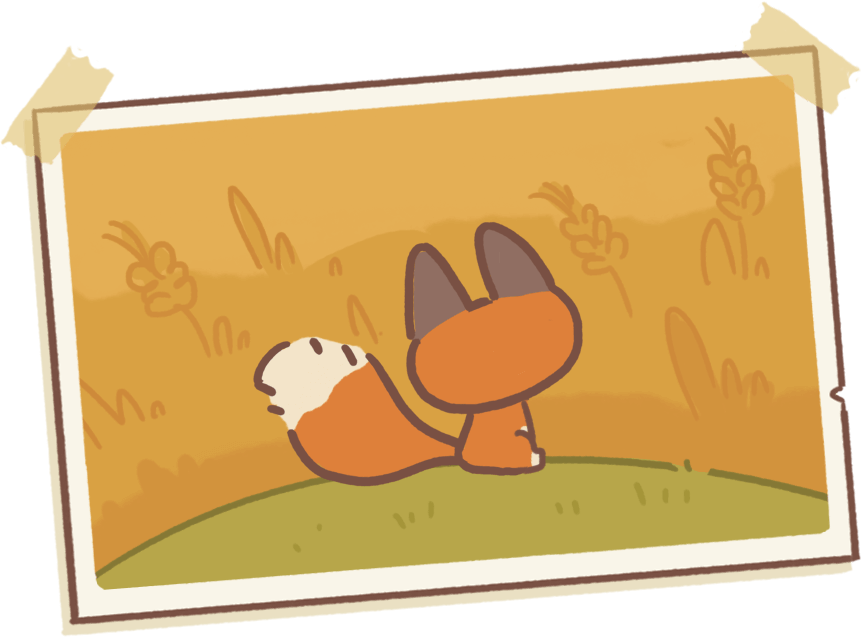
To read this letter, see: Little Fox's Letter
| Combination(s) | ||
|---|---|---|
| Slot 1 | Slot 2 | Slot 3 |
Iron Can |
Copper Can |
Gold Can |
Iron Can |
Seed | |
Seed |
Iron Can | |
| Bonus | ||
| Unlocks | Little Fox | |
| Prerequisite | ? | |
Little Fox's Diary 2
To read this letter, see: Little Fox's Diary 2
| Combination(s) | ||
|---|---|---|
| Slot 1 | Slot 2 | Slot 3 |
| Bonus | ||
| Unlocks | Sadako's Well | |
| Prerequisite | ? | |
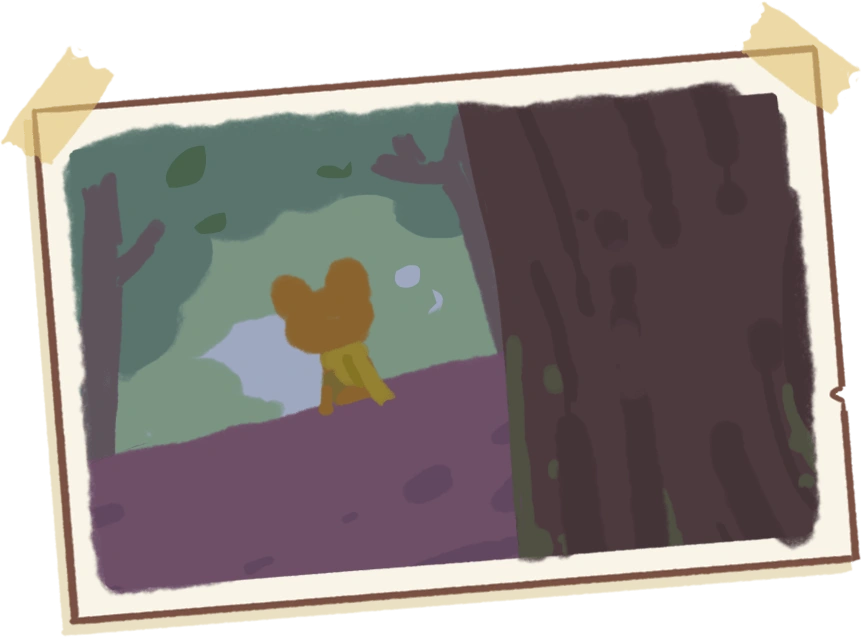
Little Fox's Diary 3
To read this letter, see: Little Fox's Diary 3
| Combination(s) | ||
|---|---|---|
| Slot 1 | Slot 2 | Slot 3 |
Copper Can |
Iron Can | |
| Bonus | ||
| Unlocks | Skeleton Trail | |
| Prerequisite | ? | |
New Zealand Journal
New Zealand Journal Page 1
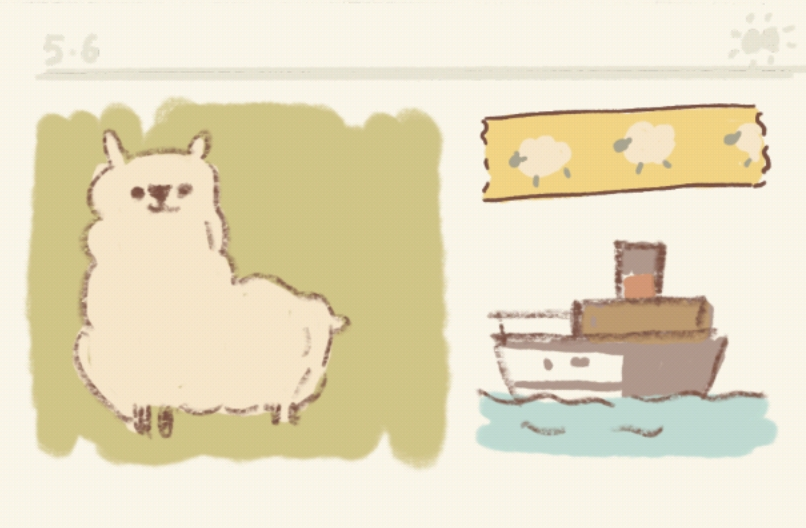

To read this letter, see: New Zealand Journal Page 1
| Combination(s) | ||
|---|---|---|
| Slot 1 | Slot 2 | Slot 3 |
| Bonus | ||
| Unlocks | Alpaca | |
| Prerequisite | — | |
New Zealand Journal Page 2


To read this letter, see: New Zealand Journal Page 2
| Combination(s) | ||
|---|---|---|
| Slot 1 | Slot 2 | Slot 3 |
| Bonus | ||
| Unlocks | Cici | |
| Prerequisite | — | |
Last Journal Page


To read this letter, see: Last Journal Page
| Combination(s) | ||
|---|---|---|
| Slot 1 | Slot 2 | Slot 3 |
Iron Can | ||
| Bonus | ||
| Unlocks | ? | |
| Prerequisite | ? | |
Newspapers
Newspaper 1


To read this letter, see: Newspaper 1
| Combination(s) | ||
|---|---|---|
| Slot 1 | Slot 2 | Slot 3 |
Iron Can |
Copper Can |
Gold Can |
| Bonus | ||
| Unlocks | — | |
| Prerequisite | — | |
Newspaper 2
To read this letter, see: Newspaper 2
| Combination(s) | ||
|---|---|---|
| Slot 1 | Slot 2 | Slot 3 |
Seed | ||
| Bonus | ||
| Unlocks | ? | |
| Prerequisite | — | |
Newspaper 3
To read this letter, see: Newspaper 3
| Combination(s) | ||
|---|---|---|
| Slot 1 | Slot 2 | Slot 3 |
| Part of the storyline, obtain with empty slots | ||
| Bonus | ||
| Unlocks | — | |
| Prerequisite | — | |
Newspaper 4

To read this letter, see: Newspaper 4
| Combination(s) | ||
|---|---|---|
| Slot 1 | Slot 2 | Slot 3 |
Gold Can |
||
| Bonus | ||
| Unlocks | Reverie Fridge | |
| Prerequisite | — | |
Old Journal
Old Journal Page 1
To read this letter, see: Old Journal Page 1
| Combination(s) | ||
|---|---|---|
| Slot 1 | Slot 2 | Slot 3 |
Iron Can | ||
| Bonus | ||
| Unlocks | ? | |
| Prerequisite | — | |
Old Journal Page 2
To read this letter, see: Old Journal Page 2
| Combination(s) | ||
|---|---|---|
| Slot 1 | Slot 2 | Slot 3 |
| Bonus | ||
| Unlocks | ? | |
| Prerequisite | — | |
Orca's Letter

To read this letter, see: Orca's Letter
| Combination(s) | ||
|---|---|---|
| Slot 1 | Slot 2 | Slot 3 |
Iron Can | ||
| Bonus | — | |
| Unlocks | — | |
| Prerequisite | — | |
Party Puppy's Response
To read this letter, see: Party Puppy's Response
| Combination(s) | ||
|---|---|---|
| Slot 1 | Slot 2 | Slot 3 |
| Bonus | ||
| Unlocks | Cici, Rescue Dog | |
| Prerequisite | — | |
Phantom's Letters
Letter Covered in Doodles


To read this letter, see: Letter Covered in Doodles
| Combination(s) | ||
|---|---|---|
| Slot 1 | Slot 2 | Slot 3 |
Gold Can | ||
| Bonus | — | |
| Unlocks | — | |
| Prerequisite | — | |
Phantom's Letter 2


To read this letter, see: Phantom's Letter 2
| Combination(s) | ||
|---|---|---|
| Slot 1 | Slot 2 | Slot 3 |
| Bonus | ||
| Unlocks | — | |
| Prerequisite | — | |
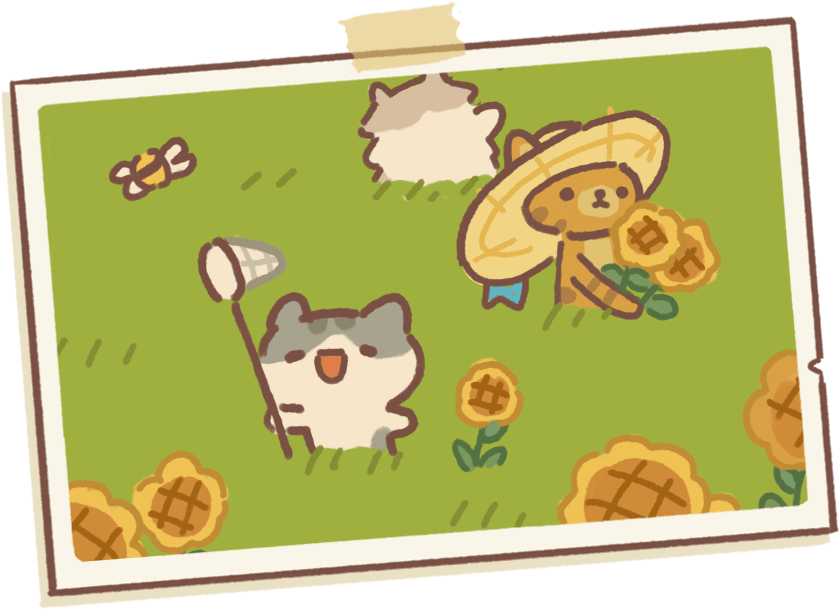
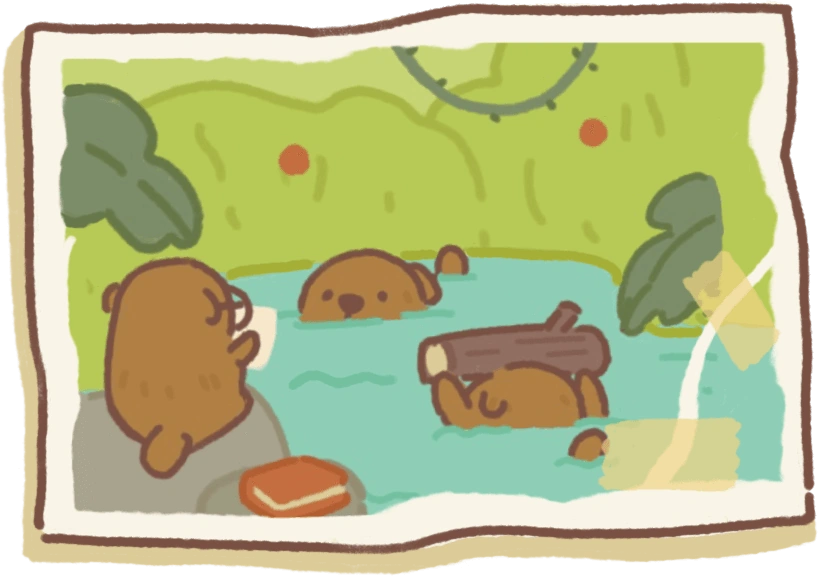
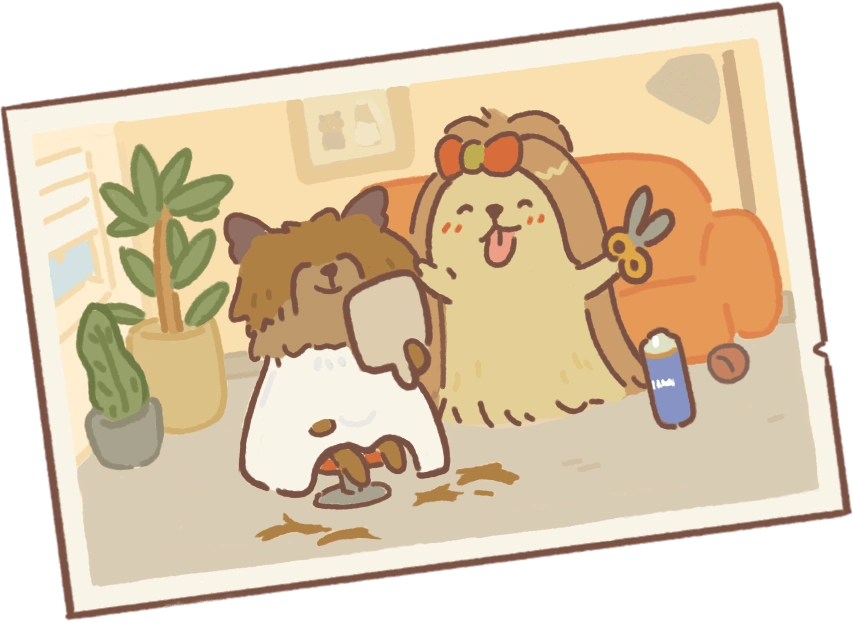
Picnic Photo
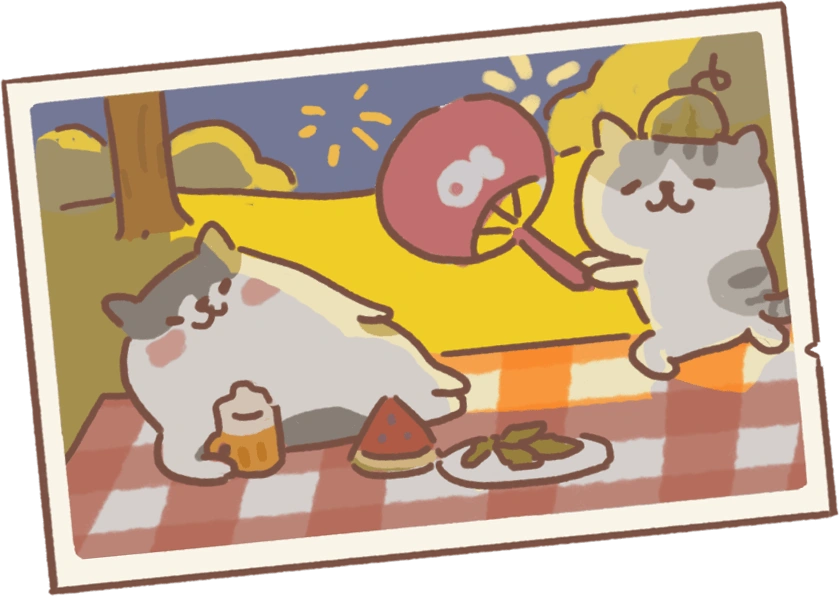
To read this letter, see: Picnic Photo
| Combination(s) | ||
|---|---|---|
| Slot 1 | Slot 2 | Slot 3 |
Gold Can |
Seed | |
| Bonus | ||
| Unlocks | Chilled Edamame | |
| Prerequisite | — | |
Salesman's Gift
To read this letter, see: Salesman's Gift
| Combination(s) | ||
|---|---|---|
| Slot 1 | Slot 2 | Slot 3 |
| You will receive this gift from the Ad Salesman when watching an ad during the Lunar New Year event. | ||
Silk Scarf & Badge
To read this letter, see: Silk Scarf & Badge
| Combination(s) | ||
|---|---|---|
| Slot 1 | Slot 2 | Slot 3 |
| Obtained randomly with empty slots. | ||
| Bonus | ||
| Unlocks | — | |
| Prerequisite | — | |
Shiba's Letters
Shiba's Letter 1

To read this letter, see: Shiba's Letter
| Combination(s) | ||
|---|---|---|
| Slot 1 | Slot 2 | Slot 3 |
| Bonus | ||
| Unlocks | Shiba Puppy, Shiba Puppy's Photo | |
| Prerequisite | — | |
Shiba Puppy's Photo

To read this letter, see: Shiba Puppy's Photo
| Combination(s) | ||
|---|---|---|
| Slot 1 | Slot 2 | Slot 3 |
| Bonus | ||
| Unlocks | Floating Teacup | |
| Prerequisite | Shiba's Letter | |
Shiba's Letter 3
To read this letter, see: Shiba's Letter 3
| Combination(s) | ||
|---|---|---|
| Slot 1 | Slot 2 | Slot 3 |
| Bonus | ||
| Unlocks | ? | |
| Prerequisite | ? | |
Sunset Luxury Tours

To read this letter, see: Sunset Luxury Tours
| Combination(s) | ||
|---|---|---|
| Slot 1 | Slot 2 | Slot 3 |
Seed | ||
| Bonus | — | |
| Unlocks | Glamorous Lady | |
| Prerequisite | — | |
White Rabbit's Order
To read this letter, see: White Rabbit's Order
| Combination(s) | ||
|---|---|---|
| Slot 1 | Slot 2 | Slot 3 |
| Bonus | — | |
| Unlocks | — | |
| Prerequisite | — | |
X Factor
To read this letter, see: X Factor
| Combination(s) | ||
|---|---|---|
| Slot 1 | Slot 2 | Slot 3 |
Seed |
Seed |
Seed |
Iron Can |
Gold Can |
Copper Can |
| Obtained randomly with empty slots. | ||
| Bonus | ||
| Unlocks | — | |
| Prerequisite | — | |
Yorkie Pup's Letter
To read this letter, see: Yorkie Pup's Letter
| Combination(s) | ||
|---|---|---|
| Slot 1 | Slot 2 | Slot 3 |
| Bonus | ||
| Unlocks | — | |
| Prerequisite | — | |
Permissions to Raise Prices
Adzuki Bean Dumpling


| Combination(s) | ||
|---|---|---|
| Slot 1 | Slot 2 | Slot 3 |
Iron Can | ||
Iron Can | ||
| Bonus | — | |
| Unlocks | Permission to raise price of Adzuki Bean Dumpling | |
| Prerequisite | — | |
Americano


| Combination(s) | ||
|---|---|---|
| Slot 1 | Slot 2 | Slot 3 |
Iron Can |
||
Iron Can | ||
| Bonus | — | |
| Unlocks | Permission to raise price of Americano | |
| Prerequisite | — | |
Buttered Toast


| Combination(s) | ||
|---|---|---|
| Slot 1 | Slot 2 | Slot 3 |
Seed |
Iron Can | |
Iron Can |
Seed |
Iron Can |
| Bonus | — | |
| Unlocks | Permission to raise price of Buttered Toast | |
| Prerequisite | — | |
Coconut Cassia Wine


| Combination(s) | ||
|---|---|---|
| Slot 1 | Slot 2 | Slot 3 |
Iron Can |
Copper Can |
Gold Can |
| Bonus | — | |
| Unlocks | Permission to raise price of Coconut Cassia Wine | |
| Prerequisite | — | |
Cupcake


| Combination(s) | ||
|---|---|---|
| Slot 1 | Slot 2 | Slot 3 |
| Bonus | — | |
| Unlocks | Permission to raise price of Cupcake | |
| Prerequisite | — | |
Cup Noodles


| Combination(s) | ||
|---|---|---|
| Slot 1 | Slot 2 | Slot 3 |
| Bonus | — | |
| Unlocks | Permission to raise price of Cup Noodles | |
| Prerequisite | — | |
Curry Rice


| Combination(s) | ||
|---|---|---|
| Slot 1 | Slot 2 | Slot 3 |
| Bonus | — | |
| Unlocks | Permission to raise price of Curry Rice | |
| Prerequisite | — | |
Fried Rice

| Combination(s) | ||
|---|---|---|
| Slot 1 | Slot 2 | Slot 3 |
| Bonus | — | |
| Unlocks | Permission to raise price of Fried Rice | |
| Prerequisite | — | |
Fried Shrimp Sushi


| Combination(s) | ||
|---|---|---|
| Slot 1 | Slot 2 | Slot 3 |
Iron Can | ||
Bluebell | ||
| Bonus | — | |
| Unlocks | Permission to raise price of Fried Shrimp Sushi | |
| Prerequisite | — | |
Mango Surprise


| Combination(s) | ||
|---|---|---|
| Slot 1 | Slot 2 | Slot 3 |
Gold Can |
||
| Bonus | — | |
| Unlocks | Permission to raise price of Mango Surprise | |
| Prerequisite | — | |
Mushroom Pasta

| Combination(s) | ||
|---|---|---|
| Slot 1 | Slot 2 | Slot 3 |
| Bonus | — | |
| Unlocks | Permission to raise price of Mushroom Pasta | |
| Prerequisite | — | |
Orange Juice

| Combination(s) | ||
|---|---|---|
| Slot 1 | Slot 2 | Slot 3 |
Seed |
||
| Bonus | — | |
| Unlocks | Permission to raise price of Orange Juice | |
| Prerequisite | — | |
Porridge & Jam


| Combination(s) | ||
|---|---|---|
| Slot 1 | Slot 2 | Slot 3 |
Copper Can |
Gold Can |
Iron Can |
| Bonus | — | |
| Unlocks | Permission to raise price of Porridge & Jam | |
| Prerequisite | — | |
Purple Sweet Potato Bun


| Combination(s) | ||
|---|---|---|
| Slot 1 | Slot 2 | Slot 3 |
Seed | ||
| Bonus | — | |
| Unlocks | Permission to raise price of Purple Sweet Potato Bun | |
| Prerequisite | — | |
Ramen

| Combination(s) | ||
|---|---|---|
| Slot 1 | Slot 2 | Slot 3 |
Seed |
||
| Bonus | — | |
| Unlocks | Permission to raise price of Ramen | |
| Prerequisite | — | |
Rice Pudding


| Combination(s) | ||
|---|---|---|
| Slot 1 | Slot 2 | Slot 3 |
Gold Can | ||
| Bonus | — | |
| Unlocks | Permission to raise price of Rice Pudding | |
| Prerequisite | — | |
Seaweed Rice Ball


| Combination(s) | ||
|---|---|---|
| Slot 1 | Slot 2 | Slot 3 |
Iron Can |
Seed | |
| Bonus | — | |
| Unlocks | Permission to raise price of Seaweed Rice Ball | |
| Prerequisite | — | |
Spaghetti


| Combination(s) | ||
|---|---|---|
| Slot 1 | Slot 2 | Slot 3 |
| Bonus | — | |
| Unlocks | Permission to raise price of Spaghetti | |
| Prerequisite | — | |
Steamed Clams


| Combination(s) | ||
|---|---|---|
| Slot 1 | Slot 2 | Slot 3 |
Copper Can | ||
| Bonus | — | |
| Unlocks | Permission to raise price of Steamed Clams | |
| Prerequisite | — | |
Strawberry Shaved Ice


| Combination(s) | ||
|---|---|---|
| Slot 1 | Slot 2 | Slot 3 |
Iron Can | ||
| Bonus | — | |
| Unlocks | Permission to raise price of Strawberry Shaved Ice | |
| Prerequisite | — | |
Strawberry Pancake

| Combination(s) | ||
|---|---|---|
| Slot 1 | Slot 2 | Slot 3 |
Iron Can | ||
| Bonus | — | |
| Unlocks | Permission to raise price of Strawberry Pancake | |
| Prerequisite | — | |
Taiyaki


| Combination(s) | ||
|---|---|---|
| Slot 1 | Slot 2 | Slot 3 |
Iron Can |
||
| Bonus | — | |
| Unlocks | Permission to raise price of Taiyaki | |
| Prerequisite | — | |